Spring Security (7) SecurityContext, Authentication, GrantedAuthority
Intro
인증(Authentication) 과정에서 등장하는 SecurityContextHolder 에 대해 다룬 이전 글에 이어서 SecurityContextHolder 에 저장되기도 하고 문서상 다음 대상인 SecurityContext 와 Authentication 그리고 GrantedAuthority에 대해서 살펴보겠습니다.
SecurityContext
SecurityContext는 Spring Security 문서에서 설명을 긁어모아봐도 별 내용이 없습니다.
- SecurityContext - is obtained from the
SecurityContextHolderand contains theAuthenticationof the currently authenticated user. - The
SecurityContextis obtained from the SecurityContextHolder. TheSecurityContextcontains an Authentication object.
SecurityContext 문서(링크)를 봐도 별 내용이 없습니다.
Interface defining the minimum security information associated with the current thread of execution.
The security context is stored in a
SecurityContextHolder.
메서드는 getAuthentication과 setAuthentication가 있고, 구현체인 SecurityContextImpl도, equals, hashCode, toString 를 추가로 오버라이딩 했을 뿐 특별히 추가로 구현한 메서드는 없습니다.
SecurityContextImpl을 상속받은 TransientSecurityContext 처럼 상황에 따라 구현해서 사용할 수 있지 않을까, 아직 잘 모르는 저로서는 추측만 해봅니다.
문서에서도 특별히 언급되는게 없다보니, 이번 글에서는 현재 인증된 사용자의 정보가 있는 Authentication 객체를 보관하고 있는 것으로 가볍게 정리하고 넘어가겠습니다.
Authentication
문서부터 살펴보겠습니다.
Authentication 객체의 주요 목적
공식 문서에서는 Authentication interface 주요 목적 두 가지를 언급하고 있습니다.
The
Authenticationinterface serves two main purposes within Spring Security:
An input to
AuthenticationManagerto provide the credentials a user has provided to authenticate. When used in this scenario,isAuthenticated()returnsfalse.Represent the currently authenticated user. You can obtain the current
Authenticationfrom the SecurityContext.
- 사용자가 인증을 위해 제공한 credentials(예. 아이디/비밀번호)를 AuthenticationManager의 입력으로 제공합니다.
- 현재 인증된 사용자를 나타내며, SecurityContext에서 현재의 Authentication을 가져올 수 있습니다.
in this scenario 는 무슨 시나리오를 이야기하는지 파악이 안돼서 일단 묻어두겠습니다.
위 Authentication 객체의 목적을 보면 인증 절차를 수행하면서 정보를 제공하기 위해 사용되거나, 인증된 사용자 정보를 저장해두고 불러오기 위해 사용되는 것을 알 수 있습니다. 그리고 AuthenticationManager가 인증 절차를 수행하는 것으로 판단됩니다. 순서대로 보기 위해 AuthenticationManager는 인증 절차를 수행하겠구나… 정도로 넘어가겠습니다.
Authentication 객체에 포함된 정보
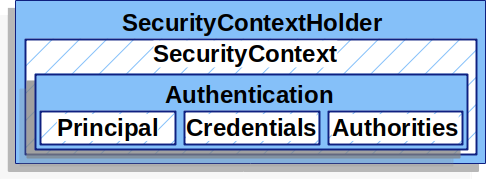
이어서 문서를 보시면, Authentication 객체에 포함된 정보에 대해 설명합니다. 이전에 봤던 다이어그램 그대로 입니다.
principal: Identifies the user. When authenticating with a username/password this is often an instance ofUserDetails.credentials: Often a password. In many cases, this is cleared after the user is authenticated, to ensure that it is not leaked.authorities: TheGrantedAuthorityinstances are high-level permissions the user is granted. Two examples are roles and scopes.
이전 글에서 문서에 있는 코드를 통해 각각을 선언한 것을 봤었습니다.
1
2
Authentication authentication =
    new TestingAuthenticationToken("username", "password", "ROLE_USER");
Principal 은 “username”, Credentials 는 “password”, Authorities 는 “ROLE_USER” 로 설정을 하고있습니다.
어디까지 파고들어야 할지 감이 잘 안잡혀서, 코드로 어떻게 구현이 되어있는지만 간단하게 살펴보겠습니다.
Authentication interface 코드(github 링크)를 보면 Java 의 security 패키지에 있는 Principal 인터페이스를 상속받고 있습니다.
1
2
import java.security.Principal;
public interface Authentication extends Principal, Serializable {
Principal 인터페이스 문서(링크) 설명을 보면 앞의 예제에서 본 것처럼 로그인 id 같은 식별자를 의미한다고 설명합니다.
This interface represents the abstract notion of a principal, which can be used to represent any entity, such as an individual, a corporation, and a login id.
Authentication interface의 코드를 마저 보면, Authorities 는 Java Collection type으로 저장할 것이라 유추가 되고, credentials 는 Object를 반환하는 걸로 봐서는 굉장히 자유롭게 구현하고 저장할 수 있을 것이라 예상됩니다.
1
2
Collection<? extends GrantedAuthority> getAuthorities();
Object getCredentials();
앞서 Authentication 에 Token을 대입한 것을 보아 조금 더 구체적으로 보기 위해서는 Token을 살펴봐야겠습니다.
1
2
Authentication authentication =
    new TestingAuthenticationToken("username", "password", "ROLE_USER");
Token
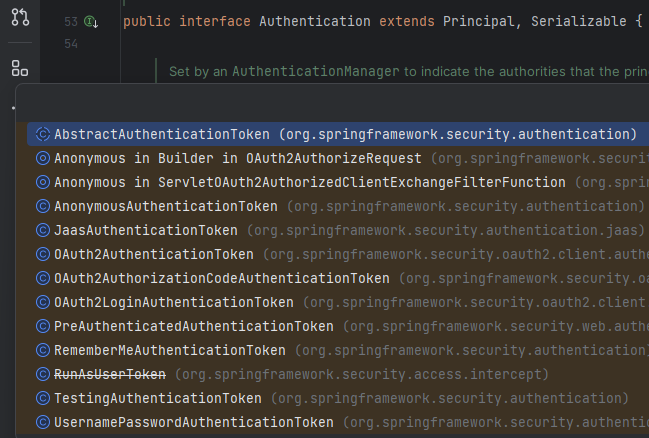
IntelliJ를 이용해서 Authentication 인터페이스의 구현체들을 살펴보면, 여러가지 Token이 구현되어 있는 것을 볼 수 있습니다.
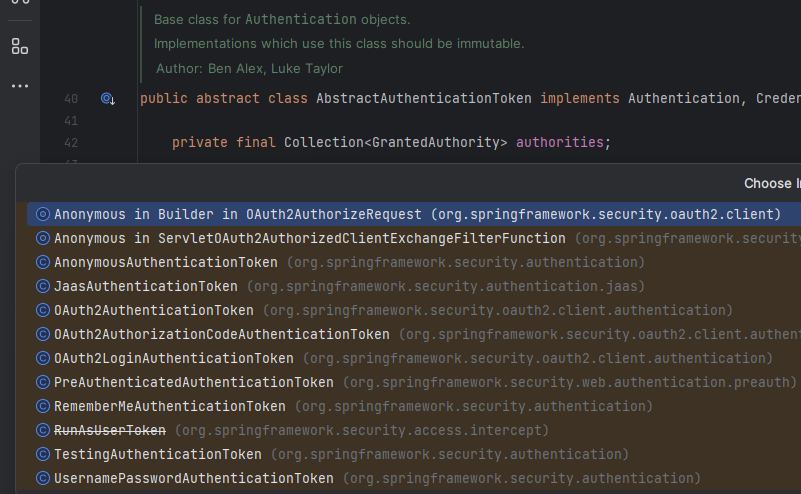
그리고 바로 Authentication 을 구현하지 않고, 추상 클래스인 AbstractAuthenticationToken을 Base로 해서 다양한 Token을 구현하고 있습니다.
1
2
3
4
5
6
7
8
public abstract class AbstractAuthenticationToken implements Authentication, CredentialsContainer {

    private final Collection<GrantedAuthority> authorities;

    private Object details;

    private boolean authenticated = false;
// ...
이전 글에서 Log나 코드에 Token이 있는 것을 보기는 했지만, 그러려니 하면서 넘어갔는데 다시 한번 생각해보면 Spring Security 에서 인증을 위해 Token을 사용하고 있다는 것을 알 수 있습니다.
인증에 대해 조금 검색해보면 인증 방식이 굉장히 다양함을 알 수 있는데, 그 중에서 Spring Security는 Token을 사용하고 있는 것입니다.
출처 : https://www.logintc.com/types-of-authentication/
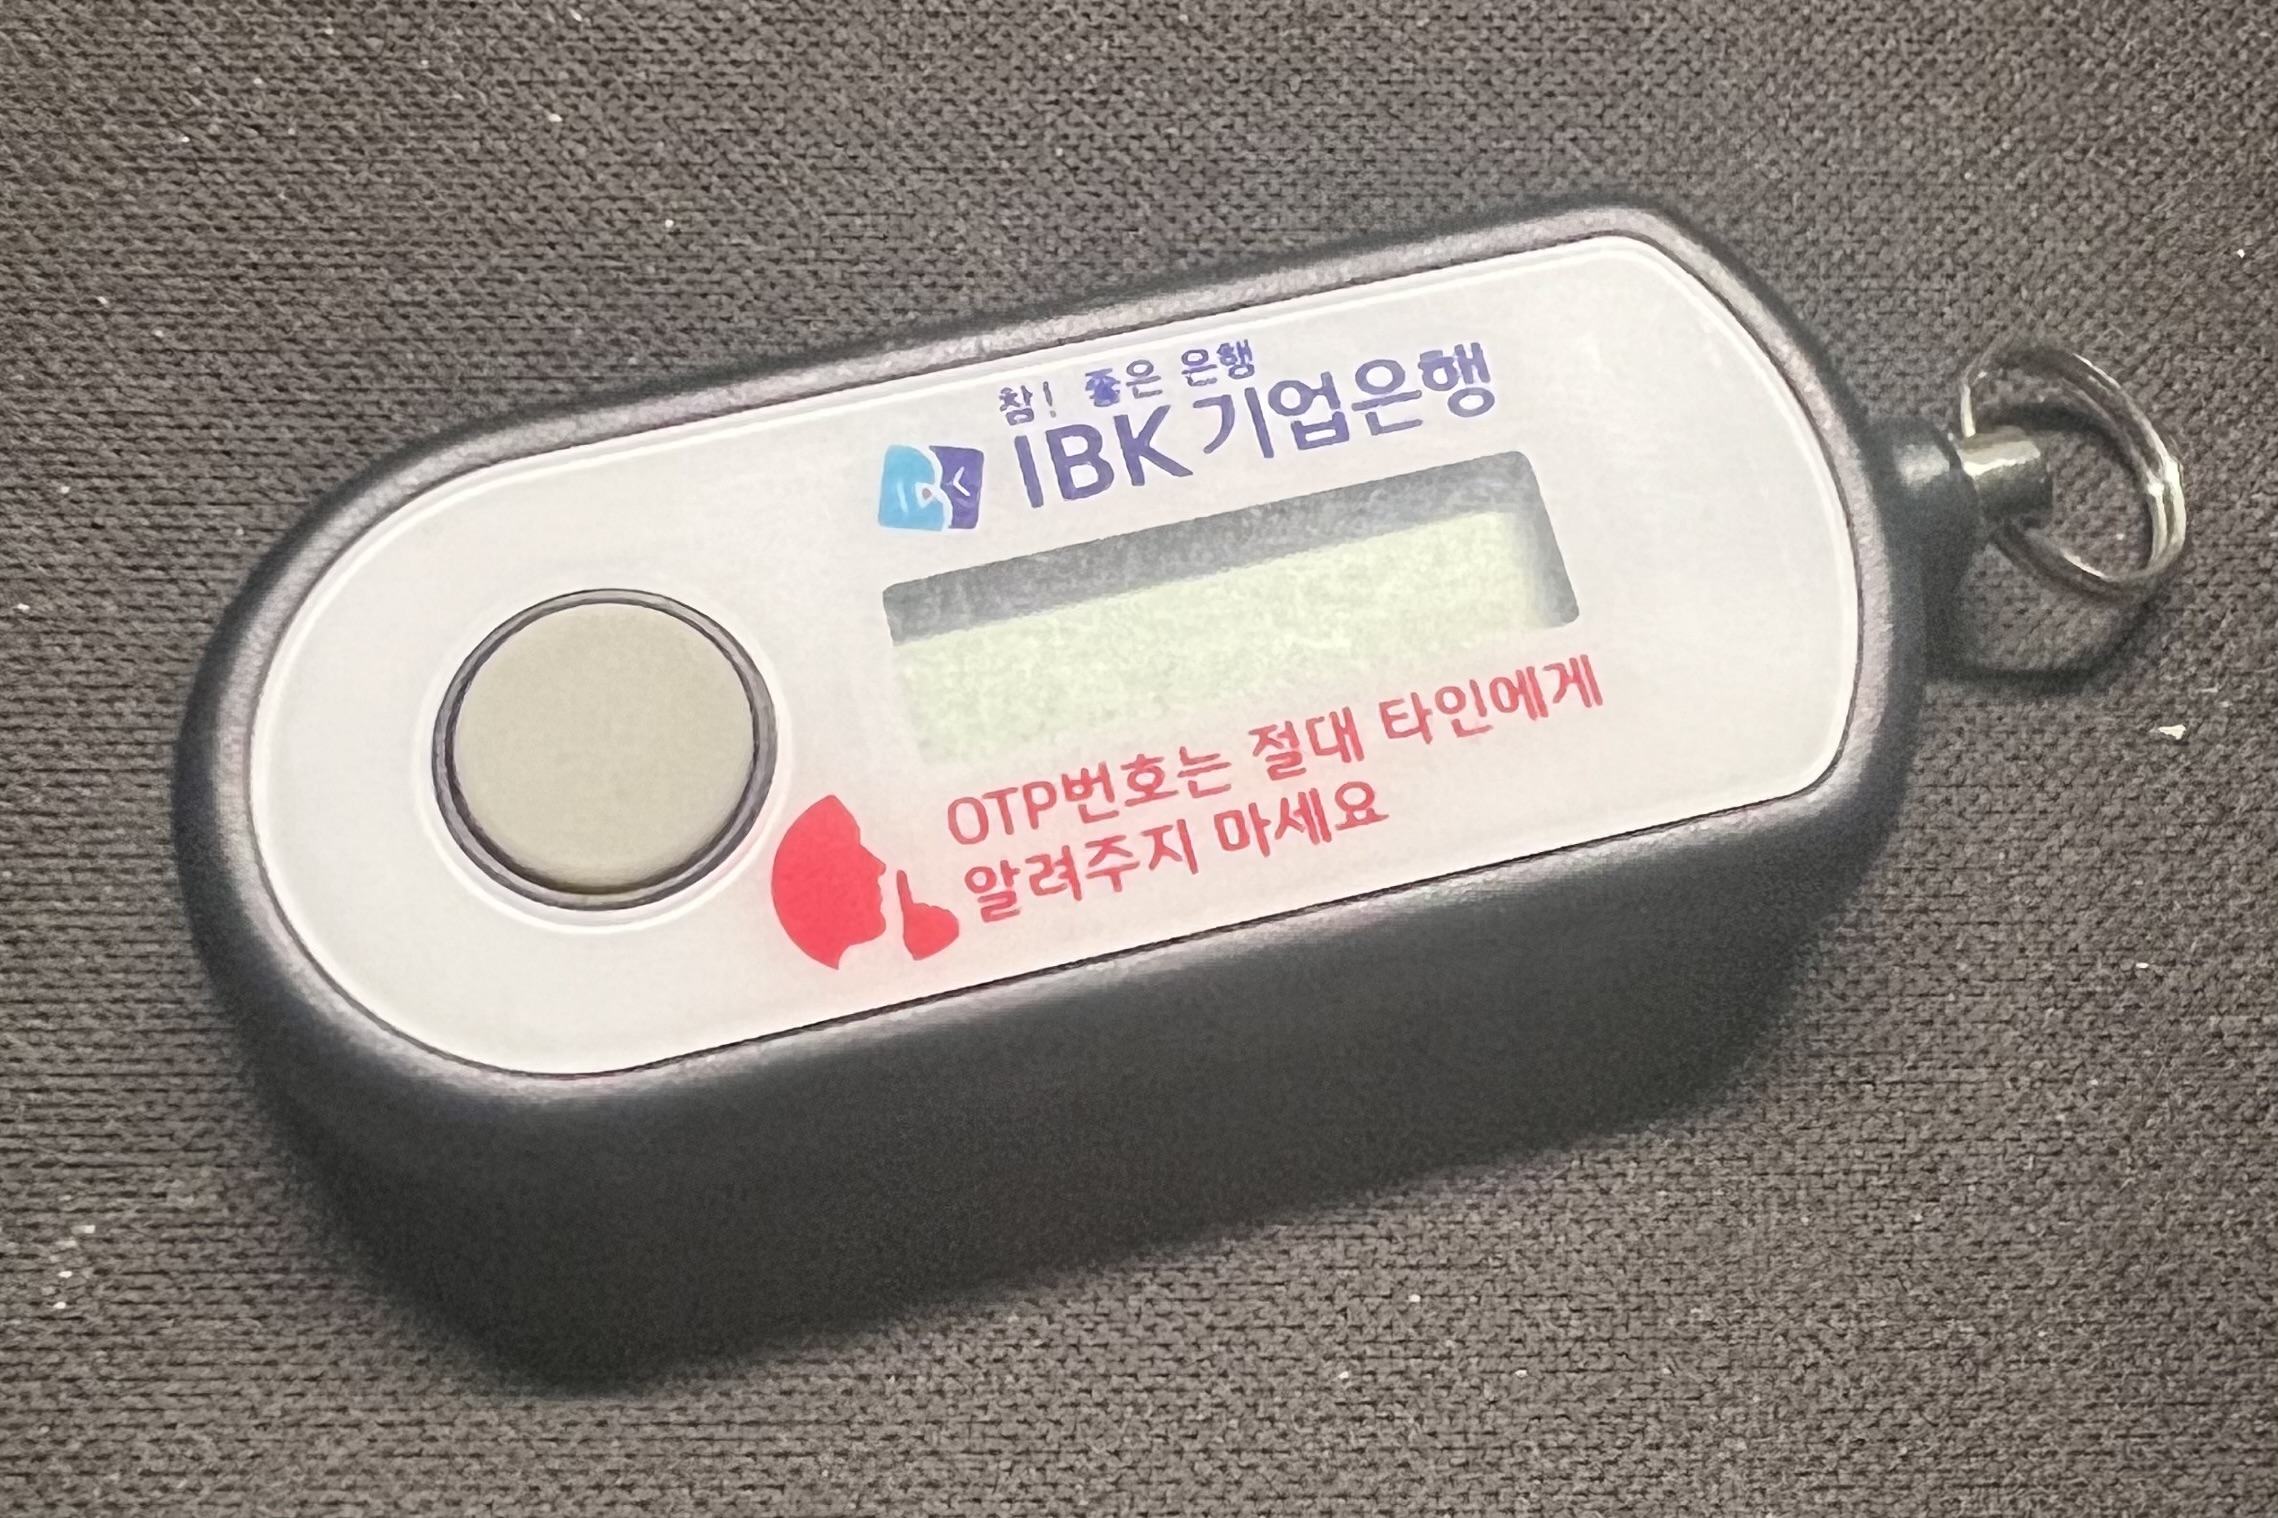
개발을 시작하면서 JWT(JSON Web Tokens)가 뭔지도 모르면서 자주 듣다보니 Token 하면 JWT가 떠오르기도 하지만, 실생활에서 자주 마주치던 Token은 은행에서 카드 형태나 작은 기기 형태로 받던 OTP(One Time Password) 기계 입니다.
Token 에 대해 파고들어가기 시작하면 또 끝이 없을 것 같아서 친숙하게 느껴지게 만들겸 뻘 소리를 많이 했습니다.
나중에 Token 에 대해서 별도로 공부하면서 정리해봐야겠습니다.
정리
일단 여기까지 정리해보자면 Spring Security 에서는 사용자 인증을 위해서 Token 인증 방식을 사용하고, Token 에는 Principal, Credentials, Authorities 정보가 저장됩니다. 이러한 Token 은 Authentication 인터페이스를 상속받아 구현합니다. SecurityContext 에 Authentcation 객체를 저장하므로 SecurityContext를 Token 보관함이라 생각해볼 수 있겠습니다.
GrantedAuthority
위에서 Authorities를 은근슬쩍 넘어갔지만, 어차피 문서에서도 바로 다음에 GrantedAuthority 를 다뤄서 미뤘습니다. “ROLE_USER” 와 같이 문자열로 역할을 나타내는 것을 봤었습니다.
문서의 내용이 길지는 않으니 문서를 따라 차례대로 살펴보겠습니다.
High-Level Permissions
GrantedAuthorityinstances are high-level permissions that the user is granted. Two examples are roles and scopes.
짧은 문장인데, high-level permissions가 뭘 의미하는건지 이해가 안돼서 탁 막혀버립니다.
이번에는 Bard의 도움을 받아 예시를 가져왔습니다.
“high-level permissions”이라는 용어는 특정 도메인 객체에 한정되지 않는 권한을 의미합니다. 예를 들어 파일 읽기 권한은 시스템의 모든 파일에 적용되므로 high-level permission입니다. 반대로 특정 파일을 읽을 수 있는 권한은 하나의 파일에만 적용되므로 low-level permission입니다.
프로그래밍 언어를 High-level과 Low-level로 구분하는 것 처럼 기계에 가까울 수록 Low-level이라고 볼 수 있겠습니다.
High-Level Permissions 의 예제를 보고 나니, “ROLE_USER” 라고 선언해서 역할로 접근을 통제하는게 사람이 더 이해하기 쉬운 High-Level Permissions 라는게 이해가 됩니다.
그럼 문장의 나머지에서 제시한 예제인 역할(Role)과 범위(Scope)에 대해서 살펴보겠습니다.
역할(Role)
You can obtain
GrantedAuthorityinstances from theAuthentication.getAuthorities()method. This method provides aCollectionofGrantedAuthorityobjects. AGrantedAuthorityis, not surprisingly, an authority that is granted to the principal. Such authorities are usually “roles”, such asROLE_ADMINISTRATORorROLE_HR_SUPERVISOR. These roles are later configured for web authorization, method authorization, and domain object authorization. Other parts of Spring Security interpret these authorities and expect them to be present. When using username/password based authenticationGrantedAuthorityinstances are usually loaded by theUserDetailsService.
앞에서 Authentication interface 의 코드를 통해 봤던 것 처럼 GrantedAuthority 를 Collection 으로 가져올 수 있고, authority는 principal에 부여되며, “ROLE_” prefix 를 붙여서 역할에 따라 권한을 부여한다고 합니다. prefix만 붙여주면 자유롭게 ROLE을 부여하고 있는 것을 알 수 있습니다.
web authorization, method authorization, domain object authorization 을 구성한다는 내용은 뒤에가서 구체적인 코드와 함께 살펴봐야하겠습니다.
username/password 기반으로 하면 UserDetailsService 를 통해서 GrantedAuthority 를 가져온다고 합니다. Spring Security에 UserDetailsService를 구현해놓은 코드를 간단하게 살펴보면, UserDetails에 저장된 GrantedAuthority 를 가져올 수 있겠습니다.
1
2
3
4
5
6
7
8
9
10
11
12
13
14
15
16
17
18
19
20
21
22
public class UserDetailsServiceImpl implements UserDetailsService {

	@SuppressWarnings({ "unused", "FieldCanBeLocal" })
	private UserRepository userRepository;

	@Override
	@Transactional(readOnly = true)
	public UserDetails loadUserByUsername(String username) {
		return null;
	}

	public void setUserRepository(UserRepository userRepository) {
		this.userRepository = userRepository;
	}

}

public interface UserDetails extends Serializable {

	Collection<? extends GrantedAuthority> getAuthorities();

//...
범위(Scope)
범위에 대해 설명한 내용도 살펴보겠습니다.
Usually, the GrantedAuthority objects are application-wide permissions. They are not specific to a given domain object. Thus, you would not likely have a GrantedAuthority to represent a permission to Employee object number 54, because if there are thousands of such authorities you would quickly run out of memory (or, at the very least, cause the application to take a long time to authenticate a user). Of course, Spring Security is expressly designed to handle this common requirement, but you should instead use the project’s domain object security capabilities for this purpose.
이번에는 또 application-wide permissions 라는게 나옵니다. 예를 들어 파일 읽기 권한은 시스템의 모든 파일에 적용되므로 application-wide permission입니다. 반대로 application-wide permission 이 아니라면 특정 파일에 대한 읽기 권한을 예로 들 수 있습니다.
문서에서 나온 54번 Employee 객체에 대한 권한이라는게 처음에는 이해가 안됐습니다.
생각해보면 각 Employee 마다 다른 권한을 준다는 것으로, 수백, 수천만명이 이용하는 서비스의 경우 각 사용자마다 권한을 관리한다면 생각만해도 끔찍할 것 같습니다. Spring Security 로 이렇게 한다면 사용자가 가입할 때마다 ROLE_USER1, ROLE_USER2, … 이런식으로 부여해야하는데 그럼 접근 권한을 부여할 때 과정을 생각하면 생각만해도 귀찮습니다.
정리
정리해보면, 역할과 범위는 따로 본다기 보다는 역할을 통해 권한을 부여하고 전체 어플리케이션 범위에 영향을 미치는 것으로 정리해볼 수 있겠습니다.
코드
간단하게 코드를 살펴보고 마무리 하겠습니다.
GrantedAuthority 코드(Github 링크)는 주석 제외하면 심플합니다.
1
2
3
4
5
6
7
8
9
10
11
package org.springframework.security.core;

import java.io.Serializable;

import org.springframework.security.access.AccessDecisionManager;

public interface GrantedAuthority extends Serializable {

	String getAuthority();

}
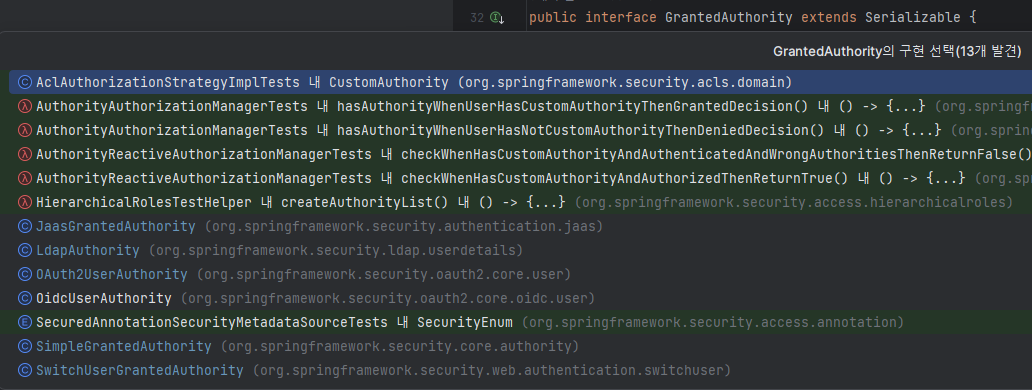
Token과 비슷하게 상황 별로 몇 가지 Authority 가 구현되어 있는 것을 볼 수 있습니다.
Test 용으로 구성된 Authority 도 많은데, 어플리케이션에 맞게 Authority 를 구현할 수 있지 않을까 생각됩니다.
Outro
이전 글에 이어서 SecurityContextHolder 내부에 있는 것들을 살펴봤습니다.
뭔가 너무 대충봐서 놓친게 있지 않을까 찝찝한 기분입니다. 지금은 지식이 부족해서 그럴 가능성이 높으니, 뒤에서 지식을 더 쌓으면 놓친게 뭔지 보일거라 기대하며 넘어가봅니다.
공부하면서 때마침 ajax 요청으로 로그아웃을 해야되는 시기가 와서 ‘SecurityContextHolder에 있는 Token을 날려버리면 되겠구나’하고 아이디어를 얻을 수 있었습니다. 뒤에서 로그아웃 절차를 자세히 보면 또 더 해줘야 할 일들이 생겨날 것 같기는 합니다.
다음은 또 순서대로 Authentication 객체의 주요 목적에서 등장했던 AuthenticationManager 부터 보겠습니다. 드디어 인증을 시작할 수 있습니다.
